
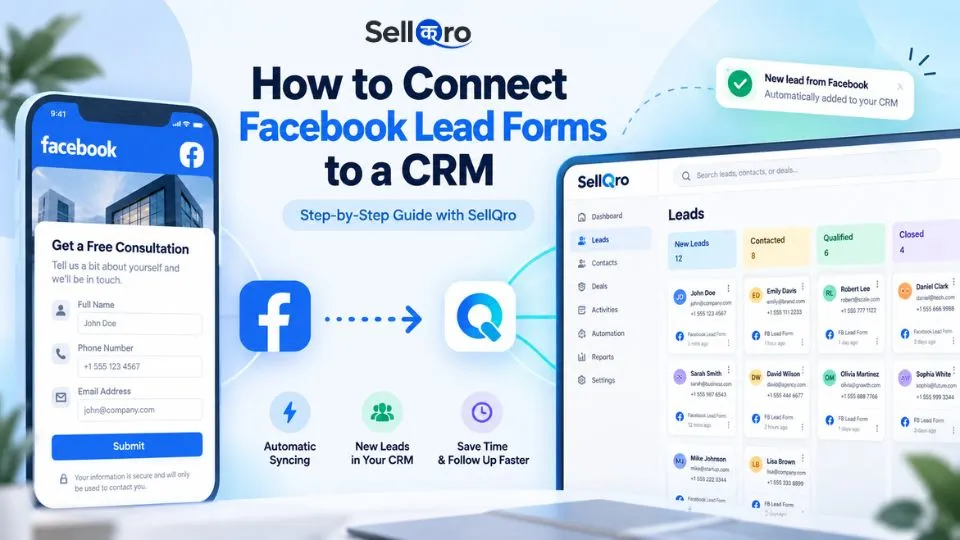
Running Facebook and Instagram Lead Ads is one of the easiest ways to generate enquiries for your business. People can submit their contact details directly through an ad without visiting your website.
But collecting leads is only the beginning.
If you’re still downloading Facebook leads manually, maintaining Excel sheets, or forwarding enquiries to your sales team on WhatsApp, you could be spending unnecessary time managing leads instead of converting them into customers.
The solution is to connect your Facebook lead form directly to a CRM.
In this guide, we’ll explain how Facebook Instant Forms work, why CRM integration is useful, and how to automatically sync your Meta Ads leads with SellQro Lead Management CRM.
What are Facebook Lead Ads and Instant Forms?
Facebook Lead Ads allow businesses to collect customer information through forms displayed directly on Facebook and Instagram.
These forms are called Meta Instant Forms, previously commonly known as Facebook Lead Forms.
When someone clicks your lead generation ad, an Instant Form opens where they can provide details such as:
- Name
- Phone number
- Email address
- Location
- Answers to custom questions
Meta can prefill some information from the person’s account, making the form quicker to complete.
For example, a real estate company might ask about a customer’s property budget, while an educational institute might ask about their preferred course.
Once someone submits the form, their information becomes available through Meta’s lead management tools.
Why do businesses prefer Facebook Instant Forms?
One important advantage is convenience. People don’t need to leave Facebook or Instagram to submit an enquiry.
This can reduce the steps involved in lead submission, particularly for mobile users.
However, easier form submission doesn’t always mean better-quality leads. Your targeting, form questions, and follow-up process still play an important role.
Meta also offers options such as Higher Intent forms that include an additional review step before submission.
You can learn more in Meta’s Lead Generation Guide.
Why should you connect Facebook leads to a CRM?
Imagine running Facebook Ads for a business that receives 30 to 50 enquiries every day.
Without a CRM, someone may have to log in to Meta Business Suite, download the leads, update a spreadsheet, and share them with the sales team.
This creates unnecessary manual work.
More importantly, if leads aren’t shared promptly, potential customers may be waiting for a response while your team is busy with other tasks.
Connecting Facebook Lead Ads to a CRM makes the process easier.
Here’s what changes after connecting your CRM:
| Without CRM Integration | With CRM Integration |
|---|---|
| Download leads manually | New leads sync automatically |
| Maintain Excel spreadsheets | Manage enquiries in one dashboard |
| Forward leads to salespeople | Assign leads through the CRM |
| Difficult to track conversations | Maintain notes and lead history |
| Follow-ups can be overlooked | Track pending follow-ups |
| Limited visibility across the team | See lead ownership and progress |
A CRM doesn’t replace your sales team. It helps them stay organised and spend more time talking to potential customers.
How to connect Facebook Lead Ads to a CRM using SellQro
There are several ways to transfer Facebook leads into a CRM, including direct integrations, third-party automation platforms, and custom API connections.
For this tutorial, we’ll use SellQro, a lead management and distribution CRM that supports connecting eligible Meta Instant Forms.
The setup is straightforward, and you can initiate the connection from your SellQro workspace.
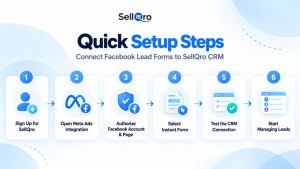
Step 1: Create your SellQro account
Already using SellQro? Sign in to your existing workspace and continue to Step 2.
First, you need a SellQro account.
- Visit the SellQro registration page.
- Enter your name and email address.
- Create and confirm your password.
- Click Register.
- Complete any verification or initial workspace setup shown.
Once your account is ready, sign in and open your SellQro dashboard.
This is where you’ll manage incoming leads, contact information, follow-ups, and team activities.
Step 2: Open the Meta Ads integration
After signing in to your SellQro workspace, find the Meta Ads section.
This is where Facebook and Instagram lead form integrations are managed.
Click Connect Meta to begin the connection process.
You will be directed to Meta’s authorization flow, where you can securely connect your Facebook account.
Step 3: Connect your Facebook account
Sign in using the Facebook account that has access to the Page running your lead generation campaigns.
Meta will ask you to review and approve the permissions required for the integration.
Make sure you select the correct Facebook Page.
For example, if you manage multiple Pages for different businesses, you should choose the Page associated with the lead form you want to sync.
Important: Your Facebook account must have the necessary Page permissions and lead access. Simply having access to an ad account may not be enough.
If you work with an agency that manages your ads, you may need the Page administrator to grant the required permissions.
Step 4: Select your Facebook Instant Form
After authorization, SellQro can display the eligible lead forms associated with the connected Facebook Page.
Select the Instant Form you want to connect.
For example, your business might have different forms for:
- Product enquiries
- Consultation requests
- Course admissions
- Property enquiries
- Service quotations
Choose the form associated with the campaign whose leads you want to capture.
Activate the selected form in SellQro.
Once connected and working correctly, new submissions from that form can be synced to your CRM without manually downloading them.
Step 5: Test your Facebook lead form connection
Before relying on the integration for live campaigns, it’s a good idea to send a test lead.
Meta provides an official tool to test lead form integrations.
Visit the Meta Lead Ads Testing Tool.
Follow these steps:
- Sign in with your Facebook account.
- Select the Facebook Page connected to SellQro.
- Choose the relevant Instant Form.
- Create a test lead using the available option.
- Open your SellQro dashboard.
- Navigate to the Leads section and check whether the test enquiry appears.
Check that the contact information and available form details have been captured correctly.
If the test lead appears, your integration is working.
If it doesn’t, review the troubleshooting section below before starting again.
Step 6: Start managing your Facebook leads in SellQro
Once the integration is active, new eligible Facebook and Instagram Instant Form enquiries can flow into SellQro.
Now your sales team can work directly from the CRM.
For example, here’s how a typical lead management process might look:
Facebook Lead Form → SellQro CRM → Lead Assignment → Call or WhatsApp → Follow-Up → Sale
With SellQro, your team can:
- View incoming leads in one dashboard.
- Assign leads to the appropriate salesperson.
- Contact leads through quick call or WhatsApp actions.
- Add notes after customer conversations.
- Update lead statuses.
- Track pending follow-ups.
- Use email templates and proposal-sending features where configured.
- Customise lead columns to see the information that matters most.
Let’s say someone submits an enquiry about a professional training course.
Your salesperson opens the lead in SellQro, reviews the contact information, calls the student, and records the conversation.
If the student asks for a callback the next day, that follow-up can be tracked in the CRM.
Other authorised team members can see the progress without needing a separate spreadsheet or repeated status updates.
How to check whether Facebook leads are syncing correctly
After completing the setup, it’s worth checking the integration occasionally, especially when you create new lead campaigns.
Start by comparing recent submissions in Meta with the leads received in your CRM.
Make sure the correct forms are connected, and check whether new leads appear with their expected details.
If you create another Instant Form for a new campaign, don’t assume it will automatically be connected. Review the integration and activate the new form if required.
Also, remember that connecting a CRM generally syncs new eligible submissions. It doesn’t necessarily import all leads collected before the connection was established.
For older enquiries, you may need to download the leads from Meta and import them into the CRM separately.
Facebook leads not showing in your CRM? Here’s what to check
If your Facebook lead form is connected but new leads aren’t appearing in SellQro, these are some common issues to investigate.
1. Check Facebook Page permissions
Your Facebook account needs the appropriate permissions to access leads from the selected Page.
Depending on your Meta Business settings, lead access may be controlled separately.
Check your Page and business portfolio settings in Meta Business Suite and confirm that the required lead access is available.
2. Confirm you’ve selected the correct Page
If you manage multiple Facebook Pages, you may have connected the wrong one.
Open the Meta Ads integration and confirm that the Page matches the one used by your campaign.
3. Check whether your Instant Form is active
Connecting a Facebook Page doesn’t necessarily activate every form associated with it.
Make sure you’ve selected and activated the particular Instant Form you’re using.
4. Test with a new lead
Use Meta’s Lead Ads Testing Tool to create a fresh test submission.
Then check whether it appears in SellQro.
This helps you determine whether the issue affects the integration itself or only a particular campaign or form.
5. Reconnect your Facebook account if required
Facebook permissions can change, particularly when Page roles, business access, or account authorizations are updated.
If syncing previously worked but has stopped, check whether SellQro requires you to reconnect your Meta account.
If the problem continues, contact SellQro support with the affected Page and form details, without sharing passwords or access tokens.
Tips to get better results from Facebook Lead Ads
Connecting Meta leads to a CRM solves the data-transfer problem. However, improving lead conversion requires a proper follow-up process.
Here are a few practical suggestions.
Contact new leads promptly. Someone who recently submitted an enquiry may still be actively comparing options. Avoid leaving new enquiries unattended for hours.
Assign every lead to a responsible person. When multiple salespeople have access to the same leads, clear ownership prevents confusion.
Track the outcome of each conversation. Use statuses such as New, Contacted, Follow-Up, Qualified, Won, or Lost to understand what happens after a lead arrives.
Ask useful questions in your Instant Forms. If your business receives too many irrelevant enquiries, consider asking about budget, service requirements, or purchase timelines. Keep the form short enough that genuine prospects can complete it.
Review lead quality, not just lead quantity. A campaign generating 100 enquiries isn’t necessarily better than one generating 30 if most of those 100 leads aren’t qualified.
Your CRM can help organise this information so you can make better advertising and sales decisions.
Frequently asked questions
Can I automatically transfer Facebook leads to a CRM?
Yes. Facebook and Instagram Instant Forms can be connected to compatible CRM software through direct integrations, third-party automation tools, or APIs. Once correctly configured, new eligible leads can be transferred automatically.
How do I connect Facebook Lead Ads to SellQro?
Sign in to SellQro, open the Meta Ads section, click Connect Meta, authorize your Facebook account, select the correct Facebook Page, and activate your Instant Form. Use Meta’s testing tool to verify the connection.
Can I connect Instagram lead forms to a CRM?
Yes. Supported Instagram lead generation forms can also be connected through Meta CRM integrations, provided the necessary Page, account, and form permissions are available.
Do I need Zapier to connect Facebook leads to SellQro?
No. SellQro provides a Meta connection flow within its own workspace, so the setup described in this guide doesn’t require a separate Zapier automation.
Will my old Facebook leads automatically appear in the CRM?
Not necessarily. A newly established integration generally handles new submissions. Historical leads may require a separate export and import process.
Can I connect multiple Facebook lead forms?
Yes, provided the forms are eligible and supported by your CRM integration. Select and activate the forms you want to capture, and test each connection.
Why are my Facebook Lead Ads not syncing?
Common reasons include missing lead access, incorrect Facebook Page selection, an inactive form connection, or expired authorization. Check your permissions and test the form before reconnecting it.
Final thoughts
Facebook and Instagram Lead Ads can help businesses collect enquiries quickly, but managing those enquiries properly is just as important.
If you’re spending time downloading CSV files, updating Excel sheets, and manually forwarding contact details, connecting your lead forms to a CRM can simplify your daily work.
With SellQro, you can bring supported Meta Instant Form leads into one workspace, organise enquiries, assign responsibilities, and keep track of follow-ups.
The objective isn’t simply to collect more leads. It’s to build a process where every enquiry gets attention and a clear next step.
Want to connect your Meta lead forms without managing spreadsheets?
Explore SellQro’s Facebook & Instagram Lead CRM →
You can also create your SellQro account and get started with your lead management workspace.